I had a blast working with Michelle's photos of her Miami visit with friends. She gave me such sassy pictures that match her sassy personality and with the Miami high roller theme, I had to get some bling onto the page.
I treated the entire canvas with Glimmer Mist and then a little paint (step by step is on my blog). I recently diecut a palm leaf from some patterned paper so Iused the negative space as a stencil and inked several palm leaves onto one side of the page. I used Krylon 18kt Gold Leaf pen to write "Miami" and to draw some highlights on the palm leaves. The gold pulls from the colors in Michelle's pics.


Some of the more intricate Prima flowers can be ripped apart in the middle, creating one large flower and one smaller flower. I did that to a Prima Flower and adhered it the page. Then I cut about 2 yards of crepe paper in half lengthwise with pinking sheers. I gathered the crepe paper into a rosette with a running stitch down one side - I'll share this technique another day:). I layered the rosette on top of the larger Prima flower.

Everyone has been covering buttons with fabric, crepe paper, and all kinds of fun things so I thought I would try it. I covered a button with ribbon and then stitched it into the center of that large flower.
I Glimmer Misted some Tim Holtz Grungeboard Letters for the "NiteLife" title. GM works great on "naked" chipboard!

A couple more pieces of yellow rhinestones from my stash and finished!
About those covered buttons...
You can get them at any crafts store and sometimes even at garage sales and thrift stors. They come in a little kit for under $3 and in all different sizes. They don't look like much in the package but you can cover them with anything to make them spectacular -- if you can bend it, you can cover the button with it. Think fabric, felt, paper, crepe paper, tulle, canvas...
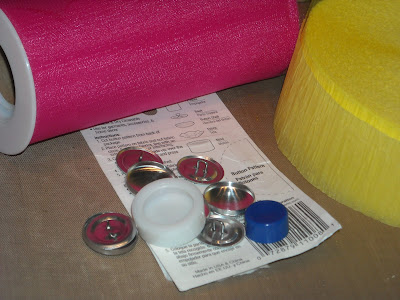
To get started you'll need the button kit, scissors, and some material to cover the button with. Here I am using yellow crepe paper and some pink tulle.
 The layer you want on top you'll need to lay down first. I wanted the tulle on top so I put that down first:
 Then put down the next layer (if any). If you're using just fabric, then you can skip this step. Since crepe paper is thin, I used four layers of it.
 After you have you fabric laid out, press the button into the tool.
 This is what it should look like after you have pressed the button into the tool:
You can trim the excess fabric away with some scissors but leave enough to be tucked into the back of the button, about 1/4" all the way around.

Stuff all the excess fabric that is hanging over the edges into the back of the button - make sure you catch all the edges otherwise they will poke out on the front:

Press the button back into the button tool , using the blue part of the tool to press it in all the way.

 To get the button out, press on the bottom of the tool until the button pops out (ignore my inky, glimmer misted fingers - hehe).
Here's what the finished product looks like:

Until next time, Happy Creating!


Jennifer you are such a show off!! :) Love the tutorial! you rock!
ReplyDeleteLove the button and that page is so cool.
ReplyDeletewow ~ amazing page jennifer!! those buttons are to die for ~ lots of love put into them!!
ReplyDelete{xoxo}
Oh MAN, I love your buttons!!! Sooo cute!
ReplyDeleteToo cute! Thanks for all the amazing techniques- I am running off to the fabric store asap;)
ReplyDeleteI love covering buttons. I never thought to use items other than fabric though. Thanks so much for the tutorial. The layout is beautiful with all your techniques. Love It!!
ReplyDelete